DOWNLOAD THE BETA FREE FROM SOURCE FORGE.
The 8K DVD Maker from HDDVD-Revived.com offers an automated workflow to create 8K DVDs on your PC. To begin, open the directory and run 8KDVD_Maker.exe.
Step 1: Enter the Film Title
Enter the title of your film. Then, select your 8K video file by clicking “Browse.” Recommended starting codecs are H.264, H.265, or VP9. It’s advised to keep the application and the video files on the same internal hard drive, preferably an SSD, due to the large file sizes involved.
Step 2: Add a 3D4K Source (Optional)
If you have a 3D4K source, you can add it at this stage. The preferred format is an anaglyph (red-blue or red-green) in 4K. A great tool for making these is PowerDirector 16. The depth control in later versions is not as precise, and earlier versions struggle with higher resolutions. You can also create these manually using software like Adobe Premiere, but PowerDirector simplifies the process significantly.
Step 3: Pick Your Background Image
Choose a background image for the DVD menu. The image should be at least 3500 pixels wide. After selecting the image, click “Create 8K.”
Step 4: Enter Film Details
The software wizard will ask for details about your film to generate the certificate and some menu entries. Follow these steps:
- Enter the year and press Enter.
- Enter the studio name and press Enter.
- Enter the director’s name and press Enter.
- Enter the producer’s name and press Enter.
- Enter the film’s budget, prefixed by the appropriate currency symbol (e.g., $150,000), and press Enter.
- Enter the project URL, including the
//. This can be your main website or a blog entry. Avoid using social media platforms at this step. Kickstarter pages are acceptable, but YouTube or similar services are not. If you don’t have an official site, leave it blank and press Enter. - Enter your Twitter or X profile URL, formatted as
//x.com/@username, or leave it blank if you don’t have one. - Enter your Facebook page URL (if applicable) and press Enter.
- Enter the SnipeSocial page URL (optional), or leave it blank and press Enter.
- If applicable, enter your YouTube channel URL or leave it blank.
- Enter your film’s The Movie Database (TMDb) page URL. If you followed the guide on HDDVD-Revived, you should have set up a free page on TMDb.
- Enter your IMDb page URL, if you have one (IMDb pages often require a premium service). If not, leave it blank.
In some cases, the wizard may ask for your SnipeSearch Movies page URL (//movies.snipesearch.co.uk). If you have one, enter it, or leave it blank and continue.
Step 5: Processing the Video
Once you’ve provided all the information, the application will begin processing your video. This can take a considerable amount of time—on our test machine, processing took around 50 minutes per minute of video. During this time, the application may appear frozen. This is a known issue; however, the software is still running. You can verify this by checking the Task Manager, where you should see the program utilizing CPU and RAM resources.
Step 6: Adding Subtitles
After processing, you’ll be prompted to add subtitles. First, enter the language code (e.g., “en” for English) and select the corresponding subtitle file. You can repeat this step for additional languages. If you don’t have any more subtitles to add, simply press Enter to proceed.
Step 7: Adding Chapters
Next, you’ll set up chapters for your menu. On hardware and standalone players, these chapters will appear as intended, but in web-based players, chapters are fixed at 10-minute intervals. For our demo, we named the chapters “Chapter 1,” “Chapter 2,” and so on. When you’ve finished, leave the last box empty and press Enter.
Step 8: Saving the ISO File
When the chapter creation is complete, a save dialogue will appear. Select where to save the ISO file and what to name it, then click Save. The process of wrapping the ISO takes about 3 minutes per minute of video. If the application appears frozen, check the Task Manager—disk usage should fluctuate as the program writes the file.
Troubleshooting the ISO
Once the ISO is created, some users have reported that it appears empty or unreadable in certain virtual environments. This is usually due to an unsupported file system. If this happens, you can extract the ISO using WinRAR and create a new master ISO using UDF 2.5 or 2.6 in ImgBurn. Alternatively, you can burn the files to a disc and create a new ISO from the disc itself.
Troubleshooting Guide: Rebuilding or Burning from DISC_TEMP with ImgBurn
When an ISO built by 8K DVD Maker won’t mount, looks empty, appears unreadable, or seems corrupt in a virtual drive, the usual cause is a mismatch between the file system inside the image and the environment trying to read it. This has shown up only on certain OS and driver combinations, but it can be alarming if you think your work is gone. It isn’t. 8K DVD Maker keeps everything required to create a fresh image or to burn directly to physical media in a safety folder named DISC_TEMP. That folder isn’t cleared when you finish a project; it’s only removed at the start of your next author to prevent stale assets bleeding into a new build. As long as you haven’t kicked off another authoring pass, your full disc structure still exists and can be written straight to a disc or repackaged cleanly into a new ISO. As a production rule you should use single- or dual-layer Blu-ray media for 8K DVD projects; this tutorial uses a dual-layer DVD purely for demonstration so you can see each prompt and setting.
Step 1: Launch ImgBurn to the start screen.

Step 2: Select “Write files/folders to disc.”

Step 3: In Source, click the folder icon to browse.

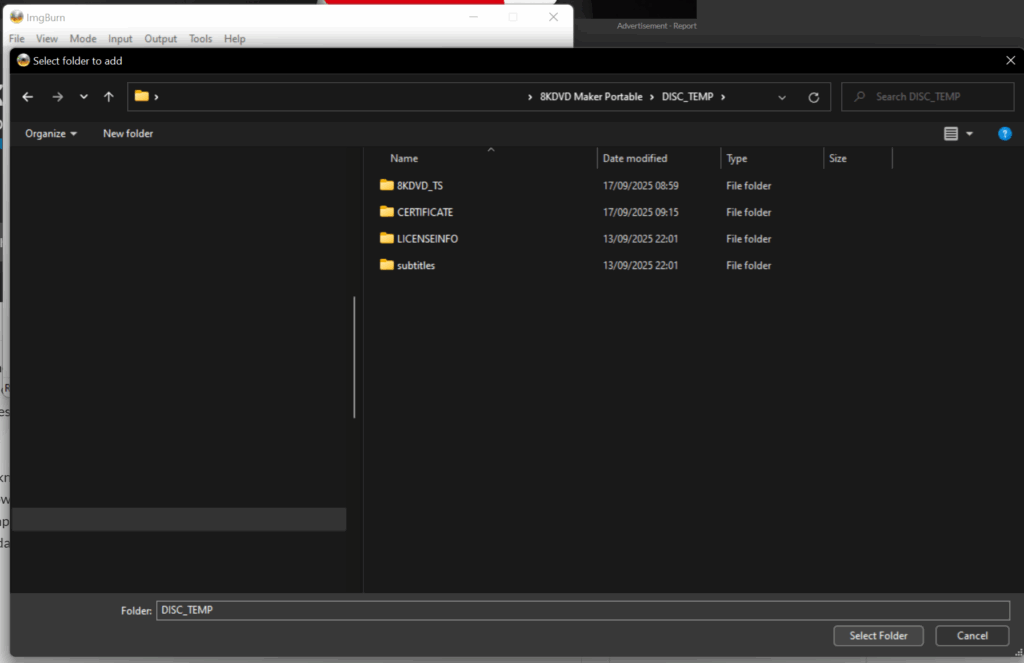
Step 4: Navigate to your 8KDVD Maker directory, select the DISC_TEMP folder, and click “Select Folder.”

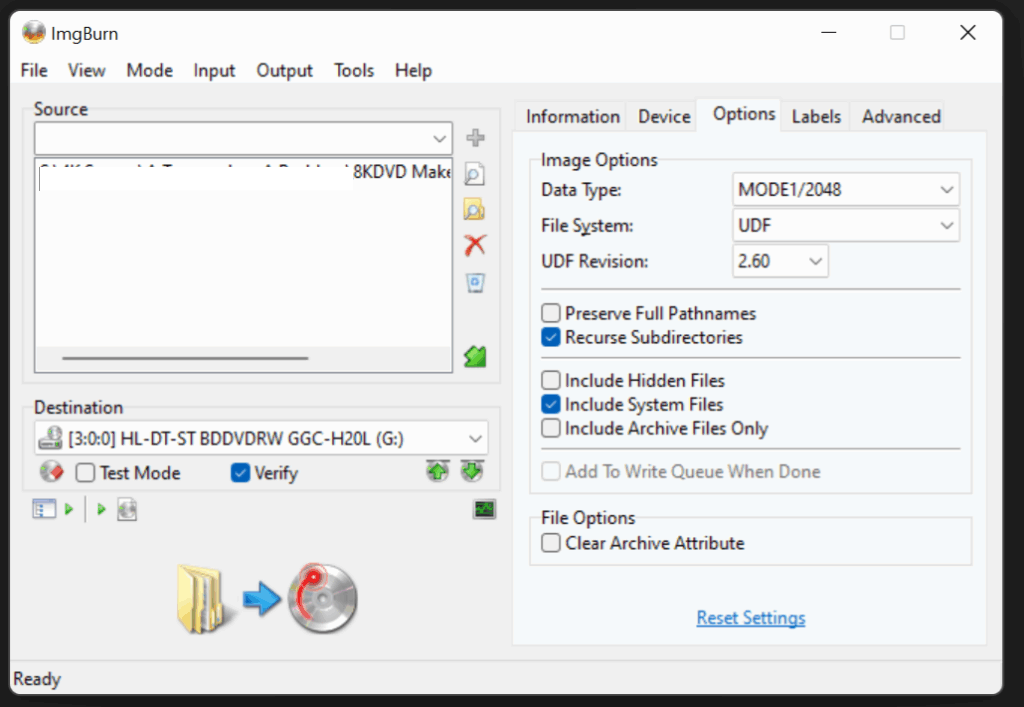
Step 5: Open the Options tab. Set File System to UDF and UDF Revision to 2.60. Ensure Recurse Subdirectories is enabled and Include System Files remains enabled.

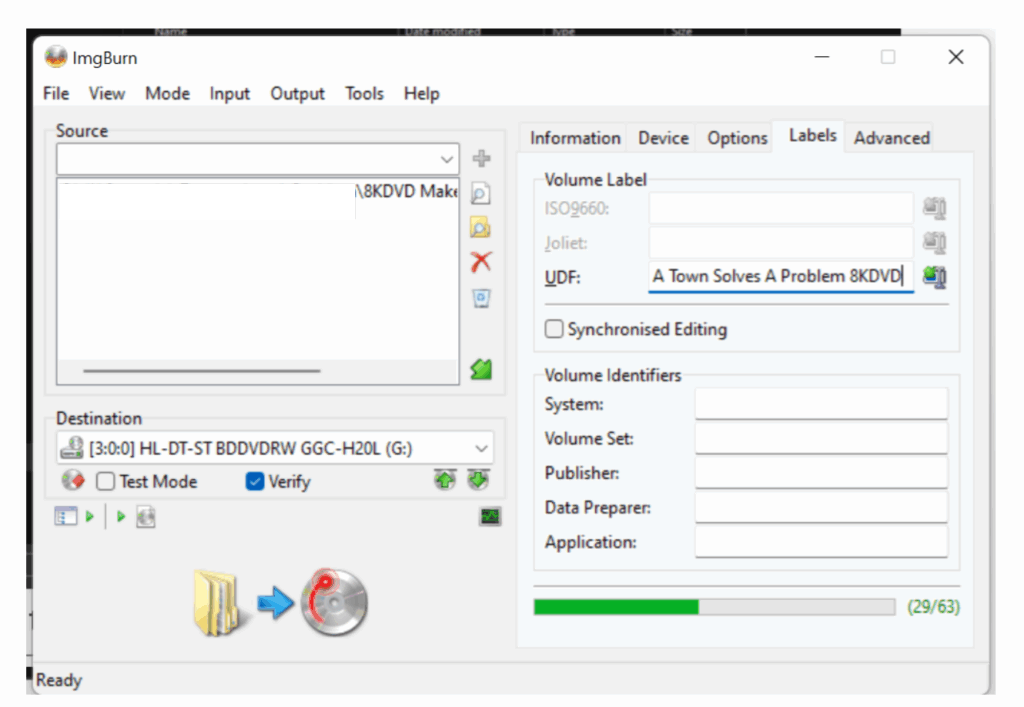
Step 6: Open the Labels tab. Enter your UDF Volume Label for the disc.

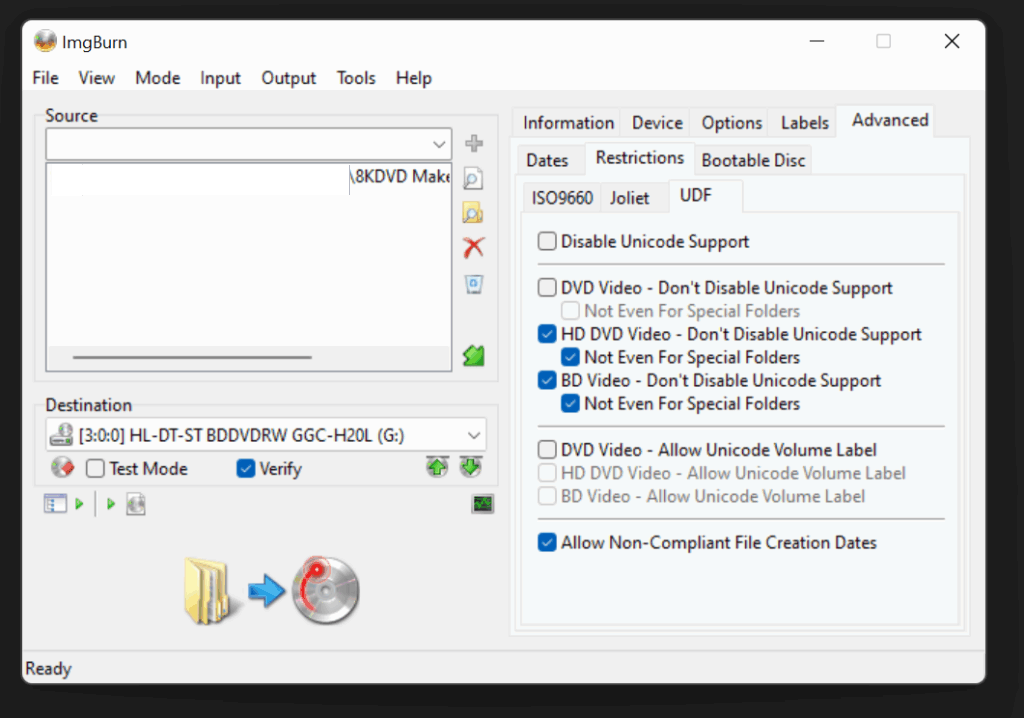
Step 7: Open the Advanced tab, then Restrictions. Enable “HD DVD Video – Don’t Disable Unicode Support” and “BD Video – Don’t Disable Unicode Support.” Leave “Allow Non-Compliant File Creation Dates” enabled.

Step 8: Confirm Destination is your burner, insert suitable media (Blu-ray recommended; dual-layer DVD shown here), leave Verify enabled, and click the Build button.

Step 9: When prompted “You’ve only selected 1 folder… Would you like me to just add the contents of ‘DISC_TEMP’ to the image?”, click “Yes.”

Step 10: Review the summary dialog showing file count, size, data type MODE1/2048, and File System UDF (2.60). Click OK to begin. Allow the burn and verify stages to complete.

To rebuild an ISO instead of burning: on the start screen choose “Create image file from files/folders,” repeat Steps 3 through 7, set the Destination to a .iso filename, accept the DISC_TEMP contents prompt in Step 9, confirm the summary in Step 10, and let ImgBurn build the image. Or of course backup the disc you just made to an Iage file
